As you know , social networking allows you to reach out to potential customers without spending exorbitant amounts of money on advertising while staying in touch with current customers. By this reason, today I introduce to you how to manage social network icons?
There are 9 steps to manage social networks icons in prestashop 1.6.x :
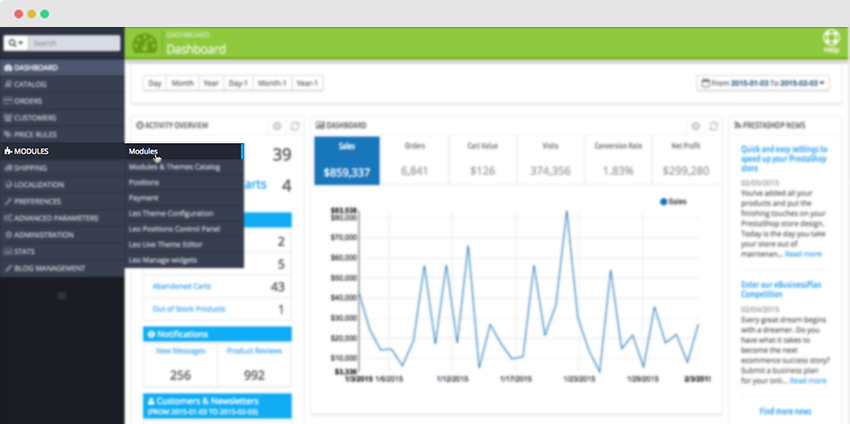
Step 1: Navigate to Modules>>Modules.
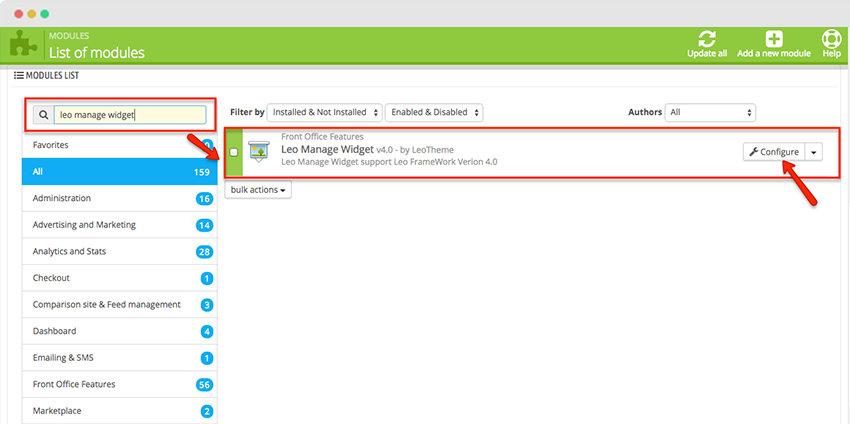
Step 2: Scroll down and search “ Leo manage widget” and click the Configure button
By this way, help you find widget name of module to edit at Leo manage widget
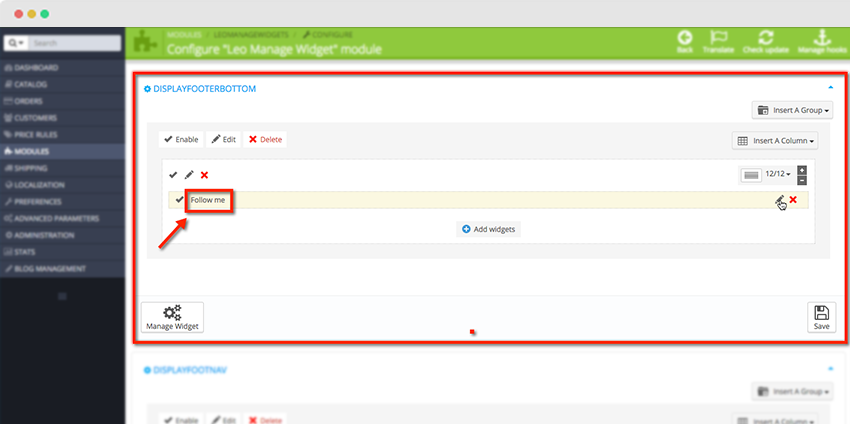
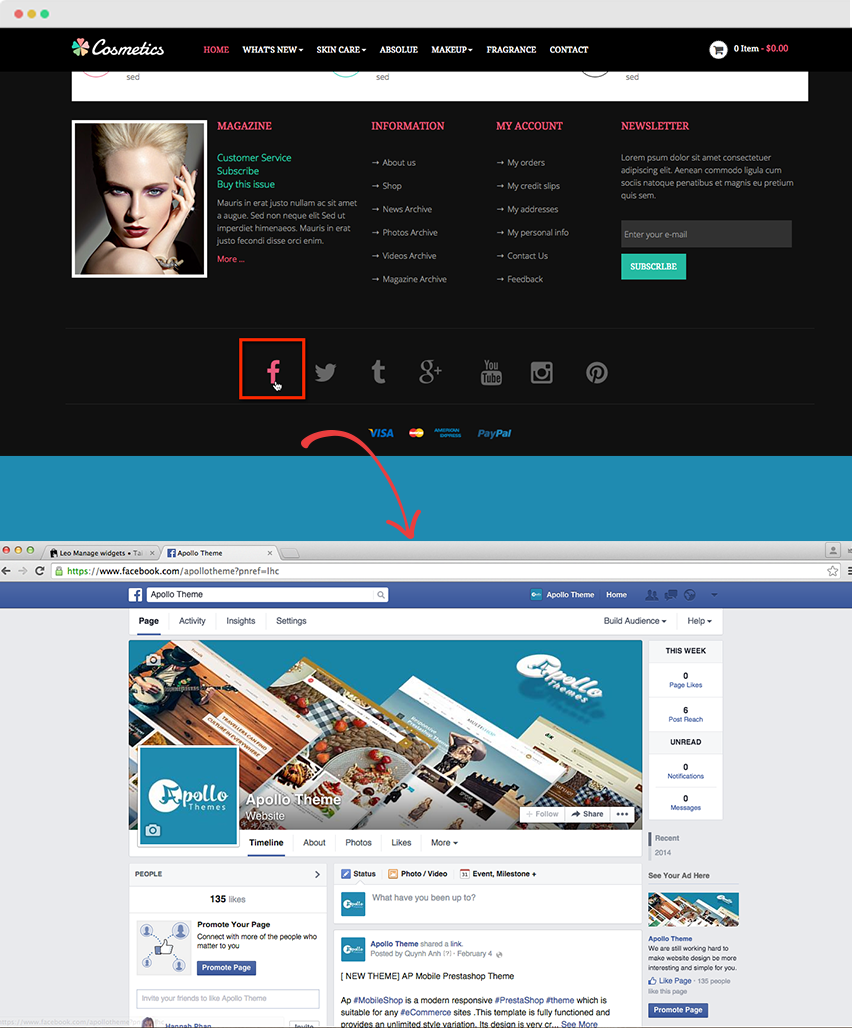
Step 3: Social networking icons display at footer , so you click at “ displayfooter bottom”

Step 4: You can see that its name is “ Follow me”
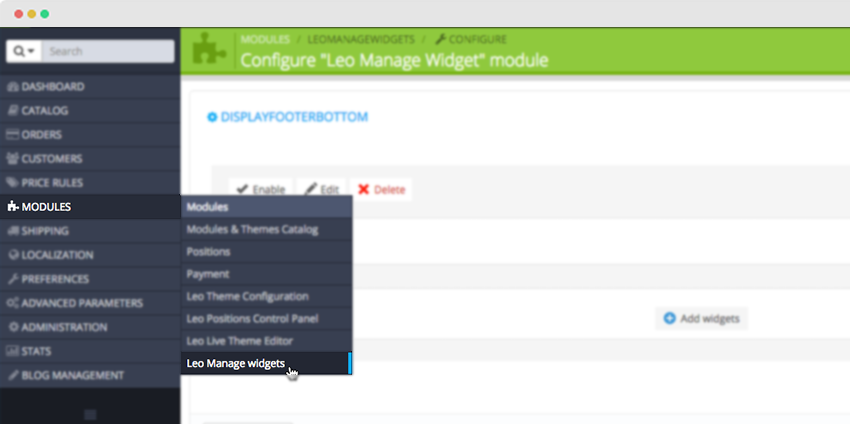
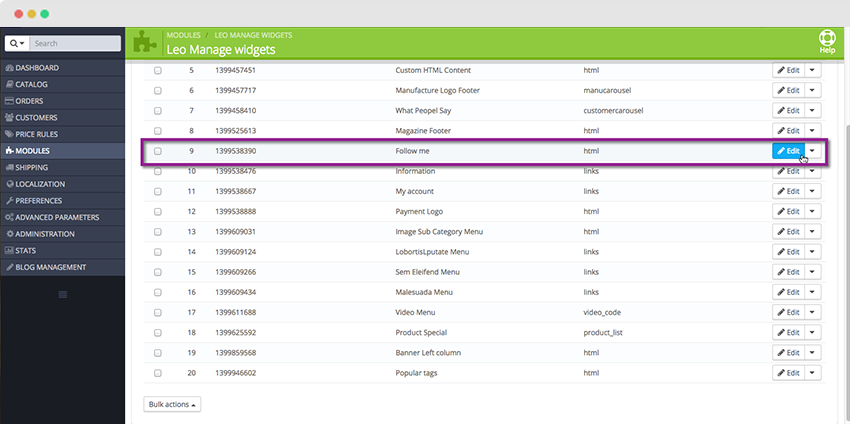
Step 5: Navigate to Modules >>Leo Manage Widgets.
Step 6:You find “ Follow me” at Widget Name item
Step 7: You click source code and enter your URLs into the fields for those social services which you want to show in the footer.
You will see the list of the following social services:
- Facebook URL – Your Facebook fan page.
- Twitter URL – Your official Twitter accounts.
- RSS URL – The RSS feed of your choice (your blog, your store, etc.).
- YouTube URL – Your official YouTube account.
- Google Plus URL – You official Google Plus page.
- Pinterest URL – Your official Pinterest account.
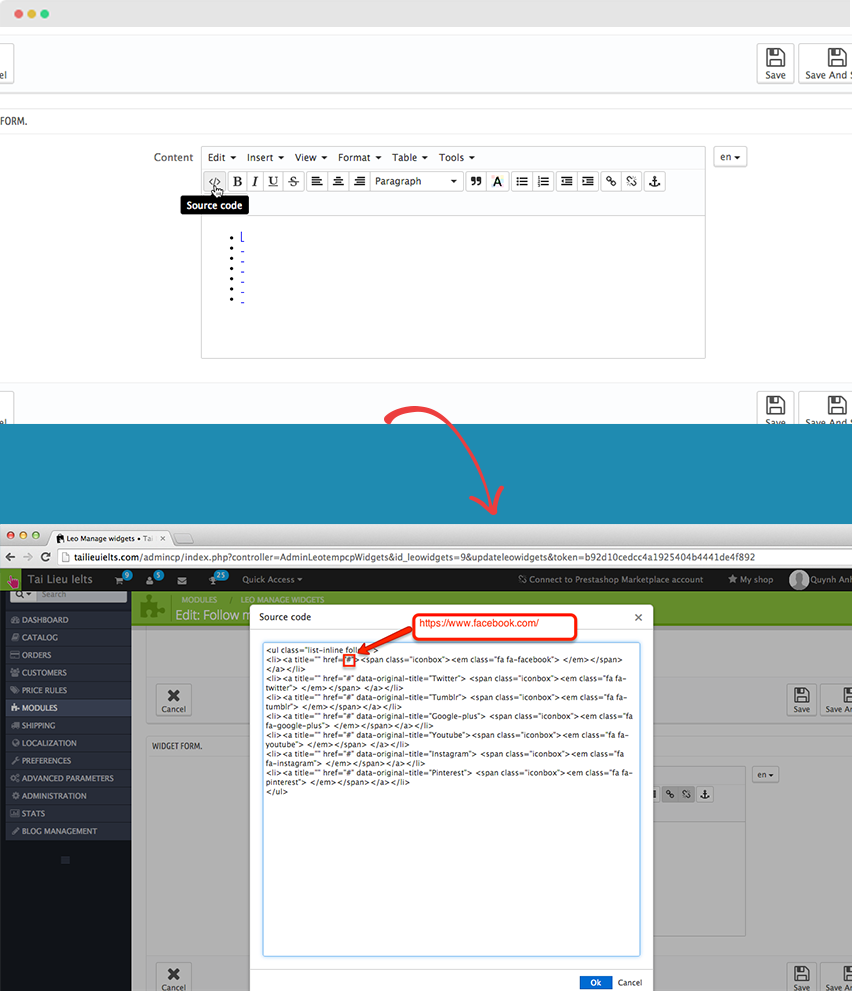
Step 8: Click ok and save button to confirm the changes
Postscript : Hope this tutorial is much of help for you while developing your e-Commerce Prestashop site.
About the author
Apollo Theme is the most modern provider of Shopify Template. With 9 years experience, we bring many modern and perfect themes to everyone. With the aim of providing high-quality products for customers, our talented team always tries to work hard and catch up the new trend of technology and design to give you more valued template with a unique combination of new ideas, flexible architecture and easy-to-use product. We are really appreciated it and hope that you enjoy it! Apollo Template want bring the highest customer satisfaction, we have professional supporting team to assist all our buyer. All support will be conducted through our support ticket "https://apollotheme.com/ticket/", send your problems to our email: "apollotheme@gmail.com" or at our facebook with name “Apollo Theme”. We usually get back to you within 24hours. (except holiday seasons which might take longer).
![[30% Off] Theme and Module Black Friday and Cyber Monday Sales ApolloTheme 2022](https://apollotheme.leotheme.com/wp-content/uploads/2022/11/shopify-apollotheme-back-friday-1.jpg)

![[30%Off] Best Christmas Sale 2021 – Apollotheme.com](https://apollotheme.leotheme.com/wp-content/uploads/2020/11/Merry-Christmas-noel-2020.gif)